According to the locking method, there are two main types of trekking poles, the outer lock and the inner lock. The outer lock is equipped with an elastic buckle at the connection part of the two trekking poles. The length of the trekking pole can be adjusted by opening the buckle, and the buckle can be closed. Can fix trekking poles. External locking trekking poles are relatively convenient and suitable for users with relatively small hands. The inner locking trekking pole is a fixed locking method by holding the two sections of the trekking pole and rotating in different directions to adjust the friction between the expansion bolt and the inner wall. This lock is firm, but has a certain degree of strength for the user’s hand. It is required that if it is not tightened, the trekking poles may retract during use, so care must be taken.
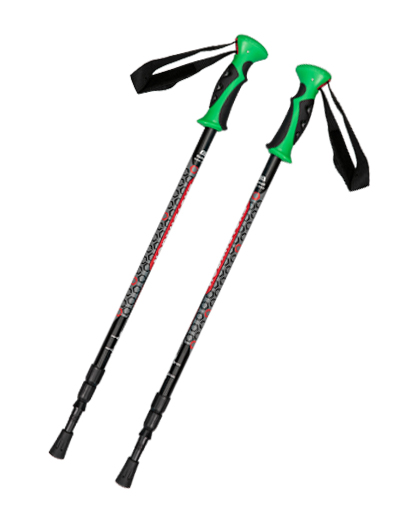
If you are engaged in specialized outdoor trekking, especially if you choose trekking poles when reloading trekking, it is best to choose a straight handle shape (as shown in the figure below), do not choose a T-shaped handle, otherwise it will not work well when used with a wrist strap use.
1. Regarding the adjustment of trekking pole length
In general, most common outdoor trekking poles on the market are three-section telescopic trekking poles. We will use this kind of trekking pole to illustrate. The length of the two sections from the tip of the battle can be adjusted. How to adjust the length of trekking poles? This needs to be adjusted according to the specific terrain.
1. Flat ground
First of all, let’s take a look at the length adjustment of walking on flat ground. We stand on flat ground, holding trekking poles, with our arms hanging down naturally, using the elbow as the fulcrum, raise the forearms so that the forearms are parallel to the ground and at a 90° right angle to the upper arms. When holding a trekking pole, the length of the tip of the pole downward and vertical contact with the ground is the correct length for using the trekking pole on flat ground. Just lock the sections of the trekking pole, and then lock the other unadjusted trekking pole. The length of trekking poles can be adjusted to the same length.
When walking on flat ground, a person’s arms will naturally swing back and forth. Similarly, when using trekking poles on flat ground, the arm swings are the same as when walking with bare hands. When the arms swing, the wrist strap will drive the trekking poles forward slightly. After the tip is on the ground, it will push you forward through the action of the wristband, just like a boat, but remember that the tip of the stick should not exceed the front of your body.
2. Uphill with a larger slope
Compared to hiking on flat ground, the length of trekking poles needs to be shortened for steep uphill roads, depending on the slope. The arm drives the trekking poles to be placed in front or above the body, and then use the wrist strap to support the body to walk up, which can effectively reduce the weight of the legs. If necessary, two trekking poles can be used at the same time for climbing. At this time, the palms can be used. Hold the handle firmly to increase strength.
3. Downhill
Adjust the length of trekking poles to be slightly longer than the normal length of walking on a flat road, depending on the actual situation. Because the impact force on the knee joint is great when going downhill, trekking poles must be used to reduce the load at this time. When stepping down, insert the trekking pole into the front of the body first, and must touch the ground before the front foot to achieve the effect of sharing the strength. Special attention should be paid to the fact that when going downhill, the cane bears heavier weight than usual, so the sections of the cane must be fully fixed and firm to avoid the risk of body imbalance caused by sudden retraction when the weight is put on. . In addition, based on the same principle, you must pay attention to the place where the cane falls. Put a little pressure on your arm at the moment the cane falls to see if the location is reliable. Don’t encounter places that are easy to collapse, such as thin mud and empty floating grass below. Collapsed cliff edge sand and gravel, etc.;
When adjusting trekking poles, the maximum adjustment length shown on the trekking poles should not be exceeded. Adjust the trekking pole to the longest. You will see that the first two sections of the trekking pole near the top will have a "STOP" or "MAX" mark. This is the longest requirement that the trekking pole should not exceed this when adjusting the length Mark, otherwise it is likely to break when encountering external force. There are length sizes in the range of trekking poles marked "STOP" for adjustment reference. When buying trekking poles, you can determine how long trekking poles you need according to your height.
2. The importance of the wristband is no less than the strength of the trekking pole itself!
When we use trekking poles to go downhill, the impact of the trekking poles should be transmitted to our arms through the wristband; when going uphill, the thrust of the arms is transmitted to the trekking poles through the wristband to generate uphill assistance. Therefore, when our wrist is passing through the wristband, we should not directly reach into the top of the wristband to grasp the handle. Instead, we should pick up the wristband, pass it under the wristband, press the band into our palm, and then Gently grasp the handle again and support the trekking pole through the wrist strap instead of tightly grasping the handle to apply force. If there is a buckle, make some adjustments, remember not to affect the operation of trekking poles.
3. Application of snow/mud support
Usually, after buying trekking poles, we will find that there is a plastic bowl near the tip of the pole. This is called a pole support. According to the different walking environment, it is divided into mud support and snow support. Many friends don't know what this is for, and even think this is a hindrance to the habit of removing it. In fact, the use of the rod holder is also very important. It is mainly used to prevent the sharp tip of the rod from being inserted too deep and causing danger when walking in various terrains. Imagine that the ends of our canes are very sharp. If it is on a very soft ground, the tip of the cane will easily sink into the ground when the body weight is under strong pressure. This will cause more users. Efforts to pull out the cane; another example is to walk on a rocky sea. If the cane is not supported by the cane holder, not to mention the tip of the cane, even the first section can easily be inserted into the seam of the stone. Failure to pull out in time will cause the cane to break, or even Risk of imbalance in the body. Therefore, for safety reasons, please do not remove the cane holder at will.
By the way, the quality of trekking poles is directly related to your safety. Imagine, if you suddenly unlock or break when you put all your weight on the trekking poles in a special area, what a terrible thing it would be!
The use of trekking poles is to reduce the pressure on the legs and increase the overall continuous endurance of the body. Therefore, although the above method of use is the most scientific method, it may not be completely suitable for everyone, as long as you feel that other methods can achieve the same It does not cause any harm to the body, and there is no harm in changing it appropriately.
People may feel uncomfortable when using trekking poles at first, but once you have mastered the correct method of use and got used to it, you will really find that trekking poles are like a part of your body, and you will really feel it clearly. At that time, your load will be reduced. In the long run, your knees and your meniscus will be well protected.
Two tips:
1. Some friends keep the trekking pole in the same posture when they are hiking, and they hold the trekking pole in their hands. The tip of the stick is not dragged on the ground, but held in the hand and the tip of the stick rises up. This practice is very taboo. This is because the tip of the stick is very sharp. If the tip of the stick is facing upwards when walking, if the person walking behind accidentally falls forward, it is very likely that the tip of the stick will be pricked and cause injury. Therefore, under any circumstances, the tip of the stick can only be downward, and it is strictly prohibited to rise;
2. In some sloped places, teammates need to pull each other. In this case, trekking poles must not be used as a power tool to let the opponent pull the trekking poles to climb. Even the best trekking poles may fall off, and the method of using the stick as a pulling tool is likely to cause accidents.
 TOP
TOP
We are leading China hiking poles suppliers and hiking poles factory, which was build in 2003, we maintain a strict quality control system in manufacturing and export hiking poles.
Follow:

Xibin Village, Shenzhen Town, Ninghai County, Ningbo,315614 Zhejiang, China

+86-574-65336888

+86-574-65235999
 edh@nbedh.com

Copyright © 2019 Ningbo Eastdragon Hardware Co., Ltd. All Rights Reserved. Wholesale Hiking Poles Manufacturers Web Support By :HWAQ
 ENGLISH